Discover the art of making browned butter, a flavorful ingredient that elevates both sweet and savory dishes with its nutty richness.
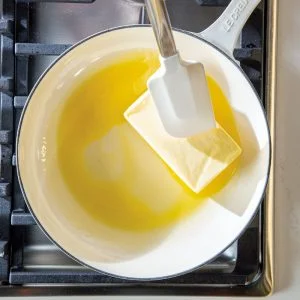
In the baking world, browned butter, often described as a nutty, amber-hued delight, can significantly enhance the flavor profile of your dishes. This guide offers a straightforward approach to creating perfectly browned butter, allowing even novice bakers to infuse their recipes with this remarkable ingredient. The humble act of browning butter magically transforms it into a culinary powerhouse that brings an unexpected depth to various recipes, from cookies to savory sauces. But what exactly makes browned butter so special?
Understanding Browned Butter
Browned butter originates from the simple transformation of butter, which consists of milk fat, water, and milk solids. Traditional American butter typically contains about 80% milk fat, while European varieties boast at least 82%. This slight difference in composition influences not just flavor, but also the browning process. When butter is heated, the water evaporates and the remaining milk solids begin to caramelize, resulting in the distinctive golden-brown color and rich, nutty flavor that sets browned butter apart. It’s a biochemical reaction that is quite fascinating; as the proteins in the milk solids undergo the Maillard reaction, they develop this complex flavor profile that can elevate any baked good.
Essential Tools for Success
To achieve superior browned butter, consider your equipment:
- Pan: Opt for a light-colored skillet. This will help you monitor the browning process more effectively. Dark pans can obscure the color change, leading to burnt butter instead of the desired toasted hue.
- Stirring Implement: Use a silicone spatula or a whisk to keep the butter in motion, ensuring uniform heat distribution. This constant stirring is essential to prevent hot spots, which can cause uneven browning.
- Heat Source: Gas stovetops typically offer consistent heat, while electric models may require slightly more time due to uneven heating cycles. If you’re using an electric stove, start at a lower temperature, adjusting gradually as needed.
Step-by-Step Technique
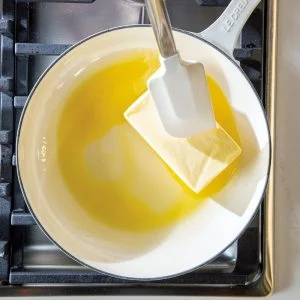
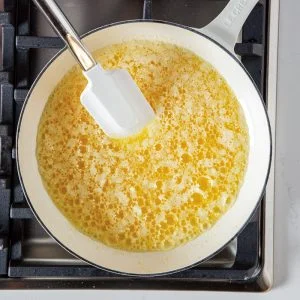
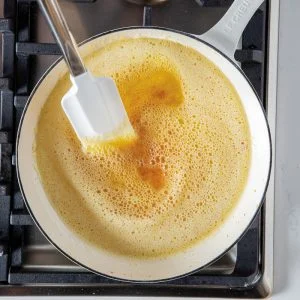
1. Begin by melting butter in a medium light-colored skillet over medium heat. Stir frequently as the butter cooks. You'll notice it bubbling, then transitioning into a medium-brown color, accompanied by a distinct nutty aroma. Depending on the quantity—1 to 2 cups (227 to 454 grams)—this process should take around 10 minutes. This timing can vary slightly based on the stove and pan temperature, so stay vigilant. It's easy to move from perfectly browned to burnt; remove from heat to assess color as you near completion.
2. Once done, transfer the butter to a heatproof bowl to cool completely. Store in the refrigerator for up to two weeks. It’s vital to pour it out promptly to prevent residual heat from overcooking the milk solids. You might think about portioning it out for different recipes; this not only extends its usability but also makes it easy to incorporate into your baking routine.
Volume Transformation
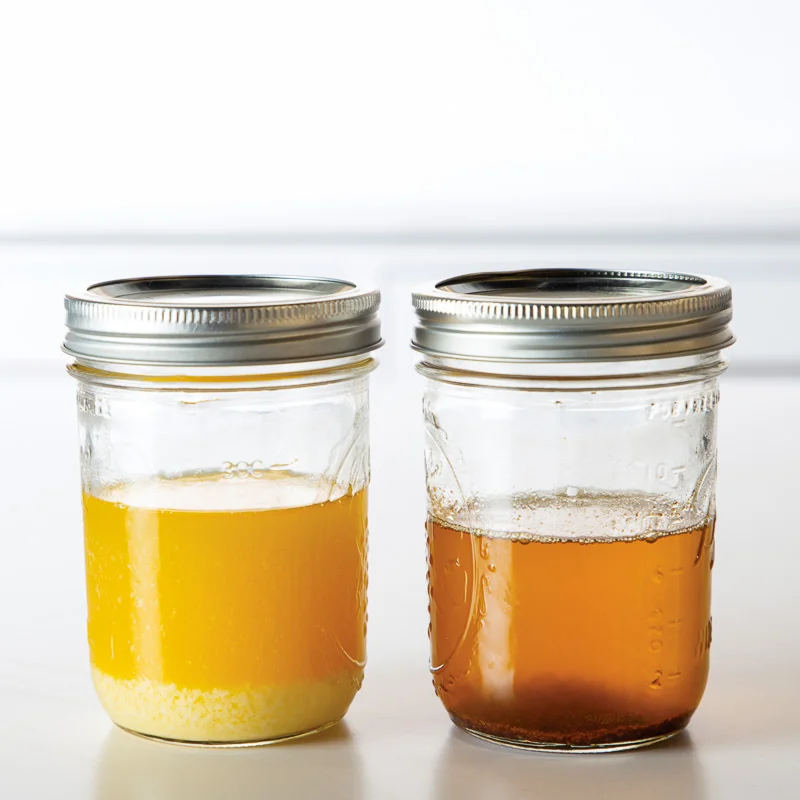
When you brown butter, you're effectively reducing its volume and weight due to the evaporation of water—approximately 18% in a stick of butter. Consequently, when 100 grams of butter is browned, you’ll end up with about 80 grams of the final product. This reduction can affect recipes that require precise measurements, so it’s crucial to keep this in mind if you’re adapting recipes that call for regular butter. The end product isn't just different in volume; its flavor intensity also increases, meaning you might want to adjust the overall quantity in your recipe.
Clarified Butter and Ghee Clarified
Clarified butter and ghee are distinct from browned butter. Clarified butter consists solely of butterfat, devoid of water or milk solids. It’s often used in cooking for high-temperature applications because it has a higher smoke point. On the other hand, ghee involves cooking butter longer to remove moisture and lightly brown the milk solids, without achieving the same depth of flavor found in browned butter. This nuance can trip up many home cooks who may confuse them, but understanding this distinction is essential if you want to master your cooking oils.
Planning Ahead
Baking often calls for chilled browned butter, so consider preparing a batch in advance. Store it in your refrigerator for quick access, enhancing a variety of sweet and savory dishes. This culinary staple can make a significant difference, elevating regular recipes into something truly special. You can even experiment with freezing portions of browned butter to have it on hand whenever inspiration strikes. It’s an efficient way to give your cooking a lift while saving time in the kitchen.
Implications and Future Outlook
The increasing popularity of browned butter amongst bakers signifies a broader trend toward flavor enhancement through technique rather than just ingredients. What this means for you, if you're working in this space, is that there's a growing appetite for sophisticated cooking methods that deliver big flavor with fundamental ingredients. In a market where consumers are increasingly focused on quality, honing such techniques can set you apart.
You’ll find that as more people recognize the benefits of simple transformations like browning butter, it may inspire them to experiment further with other cooking techniques. This trend potentially pushes the culinary envelope, encouraging home cooks and professionals alike to embrace lessons from the past while adapting to modern tastes.
The post All About Browned Butter first appeared on Bake from Scratch.


Discussion
Sign in to join the discussion.